24 May 2010

Subway Series Super-Simple Cupcakes!

All you need to make a delicious, easy, not-too-bad-for-you cake (or cupcakes) are two ingredients:

12 ounces diet cola
1 box cake mix

That's it. If you've never heard of this or tried it, I bet it sounds weird. The first time I did this was about a year ago and I was really doubtful. At the time I used Diet Cherry Dr. Pepper and devil's food cake mix. (This time I used Diet Cherry-Vanilla Pepsi and devil's food cake, as you can see above.)


 I mean... look at that! It looks so weird! But, when you mix it up a little and the carbonation dies down...


...it looks like regular [cup]cake batter. Go figure! 


Give it a try and be creative with it! I've heard using diet cream soda with french vanilla cake mix tastes delicious. And that diet orange soda with vanilla cake mix tastes like a Creamsicle. Just beware of any potential color changes - don't use dark cola with a white cake mix unless you want a confusingly brown cake!

The full nutrition information for a 16-serving batch of this wonderful recipe can be found here.

Subway Series Cupcakes
Makes 16 Cupcakes

12 oz diet cola
1 box devil's food cake mix

Preheat oven to 350 degrees F. Line cupcake pan with 16 paper liners.

Combine both ingredients until combined. Distribute batter evenly into liners (about 3/4 full) and bake for 15-20 minutes or until a toothpick comes out clean from center. Let cool completely before frosting.


I used the above mentioned Almond Icing recipe but colored 1/4 of it orange (for the Amazin' Mets), left 1/4 of it white (for the stupid Yankees), and the remaining half was dyed blue (because both teams have blue as their color). Because I used liquid food coloring, it needed a bit more powdered sugar to hold the shape when the stars were piped on them; otherwise, the frosting recipe was followed completely and yielded great results! I've had horrible luck with frostings, but I think this will be my go-to recipe as it is easy to remember (equal parts cream cheese and butter, then powdered sugar until desired consistency... so simple!) and tastes great.


Oh, by the way: the Mets won the series 2-1. I'd like to think my cupcakes helped. :)
23 May 2010

Hello Dolly!

I've seen so many recipes for Hello Dolly bars, so I created my own version for a party last weekend. It ended up being more like a chewy candy bar because I used what I had on hand.

The recipes I'd seen call for coconut, chocolate chips, and butterscotch chips; I used coconut, M&Ms, Reese's Pieces, and Heath Bar crumbles. Sugar, sugar, sugar, and more sugar! I also drizzled some dark chocolate on top of them to make them look prettier.

(Oh, don't forget that the whole mess is covered in condensed milk, which turns to dulce de leche when baked!)

Here's the basic recipe from Smitten Kitchen - I definitely recommend giving these a try! Even my ooey gooey horribly unhealthy version was awesome enough to quickly disappear at my friend's party! They were surprised, however, because I generally bake/cook healthy things... and these bars were anything but! I didn't bother calculating the nutrition information until a couple of days later because I knew I wouldn't be able to enjoy them knowing how bad they were!

But, you only live once, and it isn't like I ate the whole batch myself!

My tip for you tonight: when baking something decadent, overly sweet, or generally unhealthy -- it's a treat! Enjoy it... with friends!


In other news, I created a Twitter account for this blog, so please follow me!

17 May 2010

Feelin' Fancy?

I decided to try creating a fancy version of something basic: cornbread! I took a spin on the more common jalapeno-cheddar cornbread and made it with feta, basil, and a little bit of jalapeno instead. I also omitted all added oil and used grated zucchini instead. It was still incredibly moist, so you won't miss the oil at all, believe me!

Fancy Pants Cornbread
Makes 12 Muffins
Nutrition information is here.

1 cup whole wheat flour
3/4 cup yellow cornmeal
1 cup unsweetened soy milk
3/4 cup grated zucchini (approx. 1 zucchini)
2 egg whites
4 basil leaves, finely chopped (or 1 tsp dried)
1.5 jalapeno peppers, diced
1/2 cup crumbled feta cheese
2 tsp baking powder


Preheat oven to 400 degrees F and lightly coat 12 muffin cups with nonstick spray.

Mix dry ingredients until combined. Add wet ingredients and mix. Pour equally into 12 muffin cups. Bake at 400 degrees F for 15-20 minutes or until crowns are golden.


These were best served immediately. The next day they were good, but the feta when at room-temperature was kind of weird. Next time I think I'll omit the feta and stick with a more melt-able cheese! Otherwise, it was a great success... even my coworkers liked them!

14 May 2010

Breakin' In The Mixer: Multigrain Pizza Crusts

I mentioned in my last post that I'd be making these pizza crusts when my Kitchenaid mixer arrives. Well, yesterday when I came home from work, I had a pleasant surprise at my front door!


Needless to say, everything I originally planned on doing (cleaning, calling my parents, etc.) was thrown out the window and I got to work on those pizza crusts!


It definitely tested my patience with this recipe. I'm not use to working with yeast... and it requires a lot more waiting than I'm used to! I followed the recipe almost exactly, save these minor changes:

  • I didn't have any sesame, poppy, or other seeds on hand, so I omitted them.
  • I didn't have dried onion, so I used 2 heaping tablespoons of Mrs. Dash Garlic & Herb.
  • I used ground flax meal instead of flax seeds.
  • I only had 1/4 cup of oil (not 1/3).
  • I brushed the top of the crusts with vegetable oil and sprinkled dried oregano on top before baking.
Regardless, they were yummy! The recipe yielded 16 individual-sized crusts. I saved 4 in some parchment paper, 1 in the fridge, 6 in the freezer, and 4 I brought to work for a friend of mine. Yes, that only adds to 15... so what did I do with the 16th one?

I made a pizza, of course!


Green Monster Personal Pizza
Serves One

1 Multigrain Pizza Crust
1/2 haas avocado
2 tsp minced garlic
5 asparagus spears
8 leaves of baby spinach
1 oz. feta cheese

Top the crust with garlic, followed by spinach and asparagus. Crumble feta cheese on top as evenly as possible. Bake at 400 degrees F for 5-7 minutes or until crust gets golden on the edges. Remove from oven and top with avocado.

Yum!

Warning: Under Construction!

I am messing around with a new blog template during my lunch break today. Things are going to look weird for a while, but I anticipate some good results! Be patient with me during this change.

Thank you!

13 May 2010

Stick With What You Know

When I first began food blogging, I did so in a healthy way: finding healthy alternatives for ingredients in restaurant cuisine that could be easily made at home. Thus came Fast Food Facelift.

Now that I've switched to this blog, I've forgotten my roots. I am a health nut at times... more times than not, so it seems! I need to get back to that! I love baking decadent desserts and such, but I do need to re-focus and do what I honestly love even more than caramel, cakes, and cookies: making tasty, healthy dishes that even the most inexperienced cook with the tiniest kitchen can prepare!

Last night I posted a blog about switching from Blogger to Wordpress. I created my new blog, transferring my posts here to the new one. I really do like the features of Wordpress, but I feel like it has less customization, doesn't allow advertising, and prevents me from using some of the widgets I enjoy and find useful on Blogger. So, again, I'm going to stick to what I know... by staying here on Blogger.

That being said, I'm trying to figure out what will be the first dish I'm making with my new Kitchenaid mixer! I really want to try something with meringue, but I think I should start with something a little simpler that I already have the ingredients for and something I'm more familiar with: bread.

I'm terrible at kneading. I get tired, bored, and... well... lazy!!! Now that I'll have my mixer (and a dough hook!) I'll be able to let it do a lot of the work for me! I'd made bread a while ago and although it was extremely tasty, it made WAY too much for just one person! Two loaves! WTF am I supposed to do with two loaves of bread! I offered some to coworkers, but they are more enthused about sweets rather than whole wheat artisan bread. *grumble* I used the bread as long as I could before it went bad, but I'm not doing that again unless I find a smaller recipe, have friends who want to buy my bread, or...

...make pizza dough!

I found this recipe on Cheeky Kitchen's blog and the whole idea of it! Lots of nutrition, lots of fiber, and it makes a lot BUT it can be frozen for later use!

It requires waiting for dough to rise (another thing to test my laziness and impatience, ugh) but I hope and think in the end that the results will be worth it! I'm busy Friday and Saturday, so I'll probably make them on Sunday... or if I'm feeling up for it, I'll make it tonight (if my mixer arrives today as planned)... we'll see!

12 May 2010

A Childhood Dream

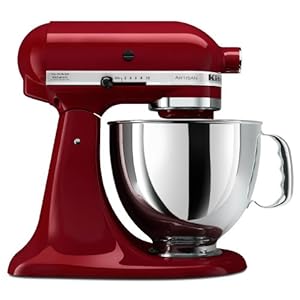
Since I was a child, my mom and I would watch cooking shows together. I've always seen this magical, do-it-all machine on so many of these programs: the beloved Kitchenaid stand mixer.

Oh, how I wanted one! My parents didn't have one. Our home economics class we took in junior high school didn't have them. My grandparents, aunts and uncles, friend's families.... I swear nobody owned one! I never even used one myself in my 24 years!

Recently I won a contest on SparkPeople! My prize: a $250 gift card on Amazon.com!

Originally I told myself I'd save it for a couple of months until I move into the more bike-able city of Cincinnati and buy a bike. However, my 6-year-old self screamed at me the other day. "Buy the mixer!" she told me. "You can finally buy it! What's stopping you??" I further convinced myself that buying a bicycle should be done in person, not online.

Next thing I knew...

I bought it!!!


I got it in Gloss Cinnamon. It should arrive by Thursday. I'm absolutely enthralled!

I had some money to spare with my gift card, so I also purchased some reusable produce bags and reusable drinking straws. Goin' green (or at least pretending, haha)!

Well, I'm going to be late for work. I just had to scream this off the rooftops!

10 May 2010

Spring Roll Tutorial


Oh, spring rolls, how do I love thee? Let me count the ways...
  1. They're so easy to make!
  2. They're versatile: you can be creative and put nearly anything in them!
  3. They're healthy (if you use the right ingredients and don't fry them, haha)!
  4. They're fun to make!
  5. And, of course, they're delicious!
So, here's how I do my egg-rollin':


Buy some rice paper. I'm pretty sure you can find this in the "international" aisle in your local major supermarket chain (Kroger, Safeway, Stop & Shop, Walmart, etc.) from a number of different brands. I got these at an international supermarket, though.


Choose some fillings. I'm all about well-balanced meals so I make sure I have some veggies and some protein; in this meal, I chose tofu sprinkled with paprika and chili powder, and some julienned carrots and zucchini. I've also used everything from tuna with spinach and avocado to shrimp with zucchini and arugula, and everything in between. Whatever you have on hand is just fine, believe me.


Add some pizzaz. Soy sauce, teriyaki sauce, hot sauce, mustard... whatever you want. But, I must say this: I am absolutely in love with Trader Joe's Satay Peanut Sauce. Love love love love love! I can't say enough about this stuff. It is godly. I use it with rice noodles, stir fry, and even as a substitute for pizza sauce when making home-made pizzas! Obviously, I use it in spring rolls as well, haha. I also use some crushed red pepper flakes to add a bit more spiciness. :)


Ready... assemble! First, you need two plates: one with water, and one without water. The one with water is used to soak your rice paper. The sheets are very thin and look opaque when you first see them. They need to be thoroughly moistened to be useable.

I never soak more than 2 sheets at a time because they tend to get stuck together if you have too many in the water. I let them sit for about 2 or 3 minutes, or until it is very very flexible... it kind of feels like skin when it's ready to be used. I pick up the sheet and shake it off gently, just a little, to get the excess water off of it.

Place the sheet on the empty non-watered plate. I usually let it sit for about 30 seconds before using so that the starch in the paper comes out and allows it all to stick together later. From personal experience, working with wet rice paper makes it really hard to keep your filling contained, and the edges won't stay sealed.

Now, here's the fun part:

Add your ingredients (don't forget the sauce!) in the center of the rice paper like this. Fold the bottom of the sheet upwards.

Fold one side inward...

Fold the top downward...

Then roll!

I make bento lunches for work and spring rolls are very common in them!

There you go! Now, go forth and make spring rolls!

08 May 2010

Carb Addiction? Maybe!

I'm realizing more and more as I look at the foods I'm eating on my SparkPeople nutrition tracker that I'm totally enamored with carbohydrates. Not necessarily white sugar (as I tend to use Truvia in my coffee, baking, etc.) or breads, but I eat lots of cereal, oatmeal, fruits, and other things that are high in carbs and naturally-occurring sugars.

But, since I've been baking and cooking more frequently due to this blog (more so baking than cooking!) I've been completely carb-crazy beyond what I've been previously!

Anyway, here are some delicious creations that were pretty simple! One is my very own creation, and one is from another blog.

Strawberry-Banana Flax Pancakes
Makes 6 Pancakes

1 cup Heart Smart Bisquick mix
2 tbsp ground flax meal
1 banana, mashed
3/4 cup unsweetened soy milk
4 strawberries, diced
2 packets Truvia sweetener
1 egg white

Combine all ingredients in a medium bowl. Make pancakes with a 1/4 cup measuring cup and cook until brown on both sides.

I don't think these need any syrup because when you get a bite that has a bit of strawberry in it, you get a punch of sweetness! Man, Bisquick is awesome -- perfect for lazy folks like myself!

Cocoa Banana Cupcakes
Makes 12 Cupcakes
Taken from Love and Olive Oil.


This was really simple to make! Substitute apple sauce for the oil and Truvia for the sugar and it will be not-so-bad for you in the end... right? (Haha.)

06 May 2010

Do You Like/Want/NEED Le Creuset??

Go here to enter for a chance to win a 2-Quart Le Creuset batter bowl!

Plus, follow her blog closely - it's pretty fantastic! Great photos and recipes galore!

01 May 2010

The Best Cookie Ever... Indeed!

A while ago I had stumbled upon this recipe. Obviously with a title of "My Favorite Cookie Of All Time" I had to give it a try!

Now, I love caramel. I've only recently (within the past year) begun enjoying chocolate, but no matter how much chocolate there is in the world, I'll always want the ooey gooey creaminess of caramel. Knowing that the caramel is the special part of this cookie, I went along with the recipe and bought the exact caramels in it from CC Confectionary.

It came with some samples, too: orange dreamsicle, and chocolate truffle. Both are amazing, so I knew I was bound to enjoy the Madagascar vanilla variety.

I have a party to go to tonight so I figured it'd be a good time to try these cookies. I had all the ingredients... why not?

I made some teenie changes, though.

Firstly, I chopped up the 3 ounces of 72% dark chocolate I had leftover from the ganache I made last time and used it in place of the chocolate chips.

Also, despite thinking that I had all the ingredients, I'm actually completely out of granulated sugar. Because the recipe only calls for 3 tablespoons of the stuff, I assumed 3 packets of Truvia would suffice (and it did).


These were so simple to make! (And the dough tasted yummy, too, haha.)


There were a few casualties, though. Next time I make these (and I definitely will make these again!) I will work on my caramel-containing technique. I ate the very very exploded one (in the right-hand photo) because I don't want to bring an empty cookie to the party... and because I wanted a snack... and it was delicious!!!

Definitely make these, all you lazy people! It's so simple and yummy!